はじめに
最近仕事がてら Pulumi に触る機会があったので軽くまとめておきます。
Pulumi とは
What is Pulumi? Pulumi is an open source infrastructure as code tool for creating, deploying, and managing cloud infrastructure. Pulumi works with traditional infrastructure like VMs, networks, and databases, in addition to modern architectures, including containers, Kubernetes clusters, and serverless functions. Pulumi supports dozens of public, private, and hybrid cloud service providers.
一言でまとめると、オープンソースのクラウドインフラの管理、作成、デプロイを行う IaC ツール です。
似たものとして Terraform はありますが、記述言語、依存関係の解決方法、料金体系、概念など様々な点で異なります。
個人で使う分には無料ですがチームや会社などで使用する場合は有償になります。
Pulumi の利点
- Python, Typescript などの言語で書くことができる(Terraform は HCL)
- IDE の補完などが効きやすい
Pulumi の設計
- プロパティを使用して、Infra に対応したリソースを作成す
- プロパティは共通化することが可能
- プロジェクトは、プログラムのソースコードと、プログラムの実行方法に関するメタデータを含む
- プロジェクトをスタックと呼ばれる単位でデプロイする(ステージング、本番など)
実際に使ってみる
$ pulumi version
v3.24.1
準備
あらかじめ以下が必要なので準備する必要があります。
- node.js の実行環境
- AWS のアクセスキーとシークレットアクセスキー
プロジェクトの作成
ここを見ながら作成していきます。 まず適当な場所に pulumi 用の空のフォルダを作成し、ディレクトリ内で以下のコマンドを実行します。 今回は Typescript で書いていきます。
$ pulumi new aws-typescript
実行後、以下の順番で質問されるので回答していきます。
- プロジェクト名(デフォルトはフォルダ名)
- プロジェクトの説明
- スタック名(デフォルトは dev)
This command will walk you through creating a new Pulumi project.

Enter a value or leave blank to accept the (default), and press <ENTER>.
Press ^C at any time to quit.

project name: (pulumi-sample)
project description: (A minimal AWS TypeScript Pulumi program)
Created project 'pulumi-sample'

Please enter your desired stack name.
To create a stack in an organization, use the format <org-name>/<stack-name> (e.g. `acmecorp/dev`).
stack name: (dev)
Created stack 'dev'

aws:region: The AWS region to deploy into: (us-east-1) ap-northeast-1
Saved config

Installing dependencies...


added 124 packages, and audited 125 packages in 40s

32 packages are looking for funding
  run `npm fund` for details

found 0 vulnerabilities
Finished installing dependencies

Your new project is ready to go!

To perform an initial deployment, run 'pulumi up'

warning: A new version of Pulumi is available. To upgrade from version '3.24.1' to '3.25.0', visit https://pulumi.com/docs/reference/install/ for manual instructions and release notes.
これでひとまず作成できました。
試しにデプロイしてみる
参考
作成時点では以下のファイルが存在します。
./
├ node_modules
├ .gitignore
├ index.ts
├ package-lock.json
├ package.json
├ Pulumi.dev.yaml
├ Pulumi.yaml
└ tsconfig.json
そのうち主に以下のファイルが pulumi に関するファイルになります。
Pulumi.yamlプロジェクトに関する定義(プロジェクトの名前、説明など)Pulumi.dev.yamlスタックごとの設定。例えば開発環境と本番環境の設定などをそれぞれスタックごとに書くことができる。index.tsエントリポイント。リソースの定義が含まれるプログラム。
生成時点では S3 のバケットのリソースを作成するプログラムが書いてあります。
import * as pulumi from '@pulumi/pulumi';
import * as aws from '@pulumi/aws';
import * as awsx from '@pulumi/awsx';

// Create an AWS resource (S3 Bucket)
const bucket = new aws.s3.Bucket('my-bucket');

// Export the name of the bucket
export const bucketName = bucket.id;
試しにデプロイしてみる
デプロイする前にデプロイ先の AWS 環境のアクセスキー、シークレットを pulumi 用に用意します。
まず、以下のコマンドまたは、~/.aws/credentials を直接修正して pulumi 用のプロフィールを追加します。
今回は profile 名を pulumi-sample にします。
$ aws configure --profile pulumi-sample
AWS Access Key ID [None]: **********************
AWS Secret Access Key [None]: ******************************
Default region name [None]: ap-northeast-1
Default output format [None]: json
profile の設定後、pulumi 側でも先ほどの profile を設定します。
$ pulumi config set aws:profile pulumi-sample
このリソースを実際の AWS 環境に deploy するには pulumi up コマンドを実行します。
$ pulumi up
Previewing update (dev)

View Live: https://~~~

     Type                 Name               Plan
 +   pulumi:pulumi:Stack  pulumi-sample-dev  create
 +   └─ aws:s3:Bucket     my-bucket          create

Resources:
    + 2 to create

Do you want to perform this update? yes
Updating (dev)

View Live: https://~~~

     Type                 Name               Status
 +   pulumi:pulumi:Stack  pulumi-sample-dev  created
 +   └─ aws:s3:Bucket     my-bucket          created

Outputs:
    bucketName: "my-bucket-xxxxxx"

Resources:
    + 2 created

Duration: 9s
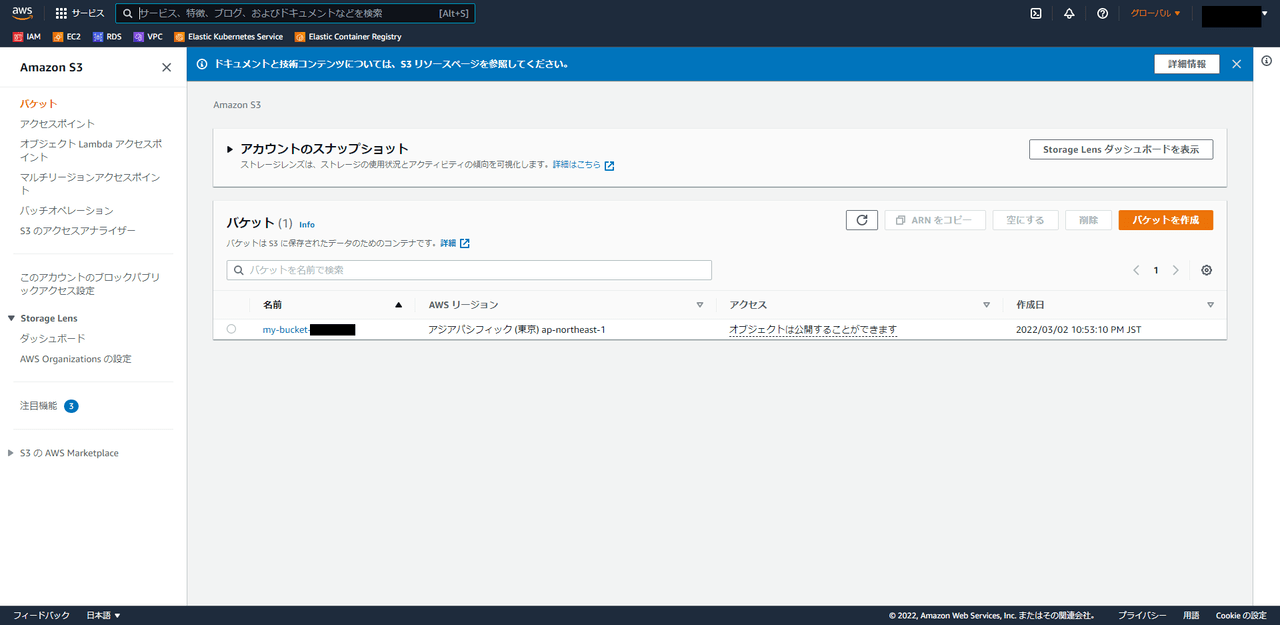
実際にバケットが作成されました。

リソースを削除する
リソースを実行するには pulumi destroy コマンドを実行します。
pulumi destroy
pulumi destroy
Previewing destroy (dev)

View Live: https://~~~

     Type                 Name               Plan
 -   pulumi:pulumi:Stack  pulumi-sample-dev  delete
 -   └─ aws:s3:Bucket     my-bucket          delete

Outputs:
  - bucketName: "my-bucket-xxxxxx"

Resources:
    - 2 to delete

Do you want to perform this destroy? yes
Destroying (dev)

View Live: https://~~~

     Type                 Name               Status
 -   pulumi:pulumi:Stack  pulumi-sample-dev  deleted
 -   └─ aws:s3:Bucket     my-bucket          deleted

Outputs:
  - bucketName: "my-bucket-xxxxxx"

Resources:
    - 2 deleted

Duration: 3s

The resources in the stack have been deleted, but the history and configuration associated with the stack are still maintained.
If you want to remove the stack completely, run 'pulumi stack rm dev'.
後片付けもコマンド一つで実行できるので非常に楽ちんです。
コマンド
他にも色々なコマンドがあります。
pulumi の dry-run 的なコマンド。
terraform でいう terraform plan に相当
pulumi preview
スタックの一覧を確認
pulumi stack ls
以前 pulumi upを実行中に Ctrl-C などで中断してしまった場合、stack と実際のインフラリソース側で不整合が発生する場合がある。
そういった場合には pulumi stack export --file <json_file_name> でファイルに出力し、スタックの状態を編集、その後 pulumi stack import --file <json_file_name> でスタックの状態を import する。
pulumi stack export --file export.json
# export.json を編集してスタックの状態を実際のインフラリソースの状態にあわせる
vim export.json
pulumi stack import --file <json_file_name>
おわりに
以前は IaC といえば、 Chef や Ansible が主流だった印象ですが、最近は Terraform や Pulumi といった新しい IaC ツールが勢いを増してきている印象です。
今後もエンジニアとして乗り遅れないように日々流行を追っていきたいと考えています。

